Top 5 Summer Travel Tips

Isn't packing for your trip the best part of vacation? Yeah, not for me either.

We travel quite often (like 5-10 times per year) and usually with both kids. As a result  I have learned some little tricks along the way.  So read on if you would like to make the packing process easier.

1. Packing Cubes

Using packing cubes is by far the easiest way to organize your travel.  Packing cubes are these awesome durable, zipable, smushable bags that fit into your suitcase, usually the top is made of mesh so you can see right through them.  I have been using them for quite some time for my family of four, but Mumi Design just sent me some new ones and they are wayyyyyy cuter than the ones I had.  I use one packing cube per person, that way everyone's clothes are divided before you go.  It makes the unpacking/sorting process way easier when you get to your destination, especially if you are staying in separate rooms. You can pop out each person's cube and give it to them. Smaller packing cubes can be used for shoes, toiletries, etc.

2. Roll it up

If you want the most bang for your suitcase-space buck you need to roll those clothes.  They take up a lot less space when rolled and they are less wrinkly when you arrive. Win win.

3. Don't over pack

I know we all like options, especially when on vacation, but try not to go overboard.  If you have access to laundry facilities while away (and it's either free or not crazy expensive) pack enough for 4 days and wash your stuff.  Most of the time when we travel we stay with friends or family, or in a place with laundry so this tip is key for us.  I pack all of our stuff in one large suitcase for a 7-10 day trip, or one medium suitcase for a long weekend.  Less stuff = less stress. Trust me.

If you can't wash your clothes while away try to pack very versatile, easy to mix & match pieces. And LOTS of underwear.  You CAN re-wear the same outfit.  People won't judge you (well maybe they will but who cares).  It's probably the minimalist in me talking, but seriously,  I have never run out of clothes while traveling and I'm always way happier to be pulling my one suitcase in an airport  than I am watching everyone else struggle to cart all their stuff around.

4.  Travel toiletries

Economically speaking travel products are a huge rip-off. Why on earth would you pay $1 for 1/10th the amount of product that costs $3???? That math just doesn't add up.  That being said, travel toiletries are super convenient.  Especially while traveling by plane.  I have a few solutions to this.  Save your samples & re-use your bottles: I end up with tons of free samples throughout the year.  Shampoo, body wash, face wipes, etc.  I save them all for travel.  I hate buying new travel sized products so I will save the containers my samples come in and re-fill them with the full size stuff.  Make sure the bottles close very well and they won't leak and you're good to go.  To be extra safe I usually put leaky, soap stuff in a plastic baggies and then into a packing cube.

Bonus tip:  Separate your travel toiletries by type and keep them separate from the rest of your stuff.  I heave ours in labelled bins in the linen closet. That way I can just grab and go as needed.

5. Don't bring what you can buy (within reason)               

Listen, when we're heading to an all inclusive in the Caribbean I am bringing enough of everything.  There is no way I'm going to pay $20 for $8 sunscreen at the resort or $30 for 10 diapers (okay, maybe it's a bit of an exaggeration but I'm not that far off).  If we are travelling within Canada or to the U.S.  I just bring enough for a few days and supplement as needed.  I'm not going to waste precious suitcase space to pack a week's worth of diapers, snacks for the ride home or anything else I can easily pick up while away.


Have a great travel tip? Get in touch and tell me about it (@organizer_alli/@EverythingInPlace/Everything In Place).  Happy travels everyone!

Tame your Tupperware!

tupperware

Who among us has never searched desperately for a lid to a food storage container after you have already put leftovers in it? Yeah, that's what I thought.

Nearly every client's kitchen I have gone into has had an issue with their Tupperware (okay, I know it's not really Tupperware because Tupperware is a brand, but that is how I always refer to my "food storage containers"  and it's a lot easier this way, so from here on out we are going with Tupperware or containers. okay?)

Alright, back to organizing your Tupperware.  Like I said, this seems to be a nearly universal problem.  Unless you are getting rid of all of your existing containers and going to be all sleek (like buying just one fancy brand where the lid fits on all of the sizes and they stack neatly) you may want to keep reading.

My advice on organizing your Tupperware is much like organizing anything else. Let's run through my 5 Organizing Steps:

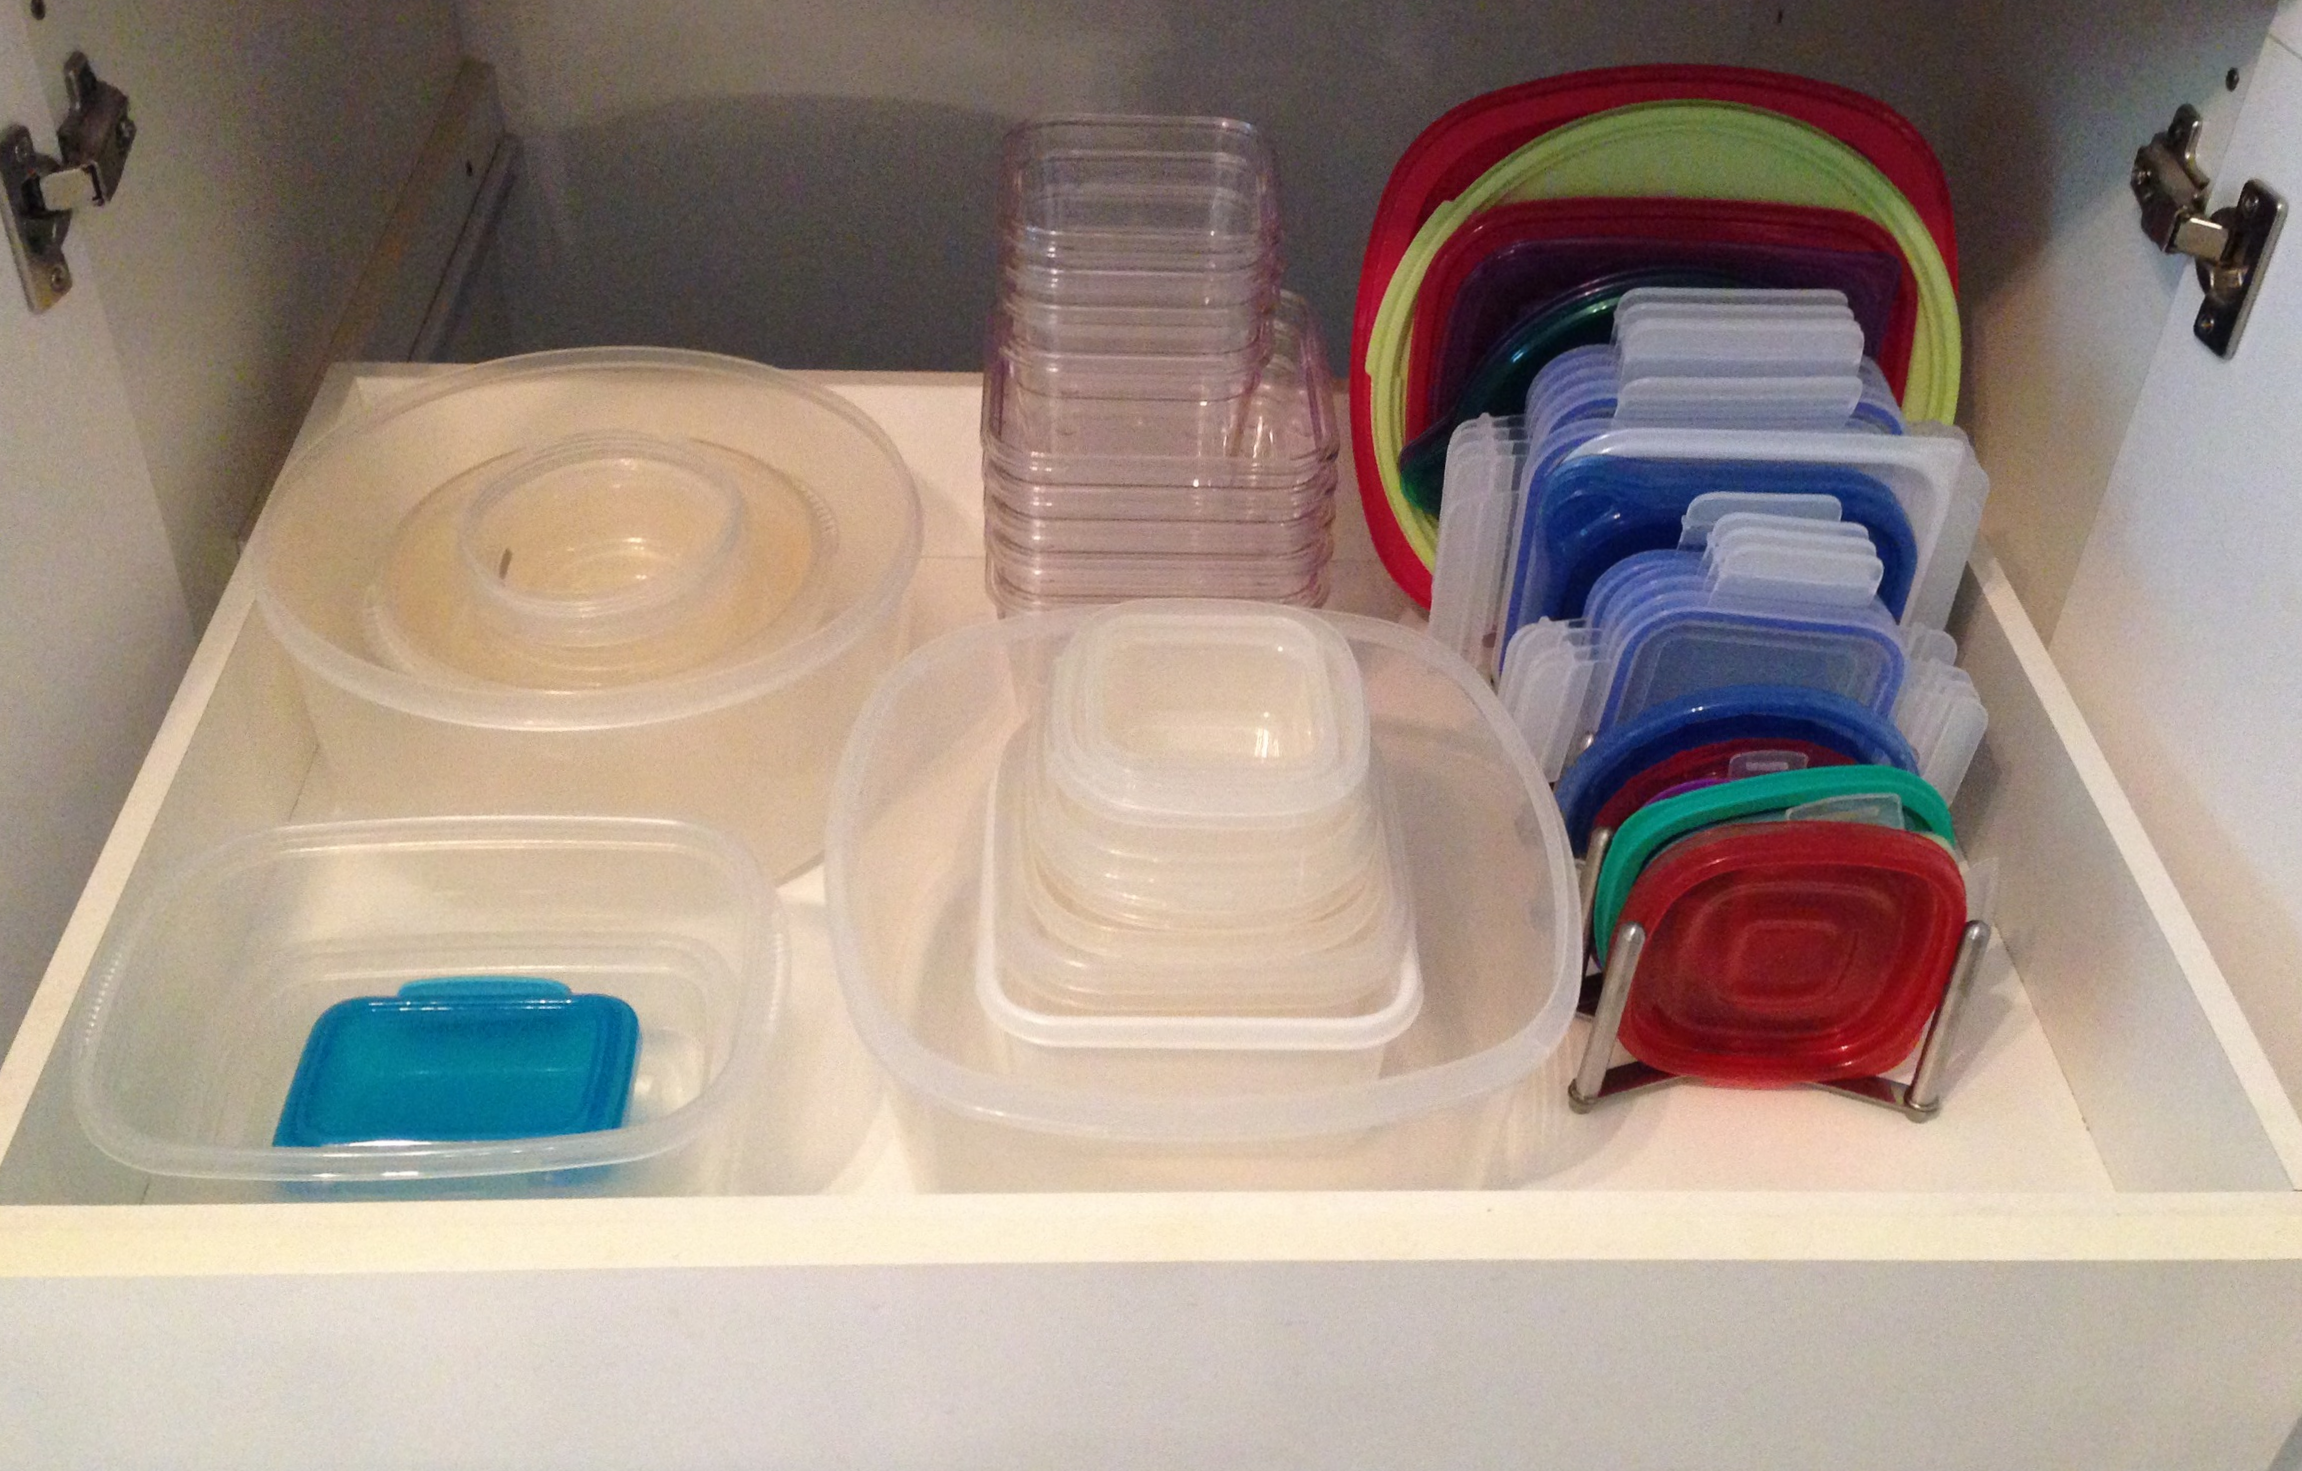
1. Like with like: Take all your containers out and sort them.   All the round ones together, all the square ones and all the rectangular ones.  Now make sure every container has a lid.

2. Declutter: all of those random, cracked, stained, stinky containers need to go.  The exception to this step is if you have an extra lid that fits another container hold onto it. Put it in a separate place for a bit.  Lids tend to crack or get lost and then you can just go to your  stock to replace it.

variera lid organizer

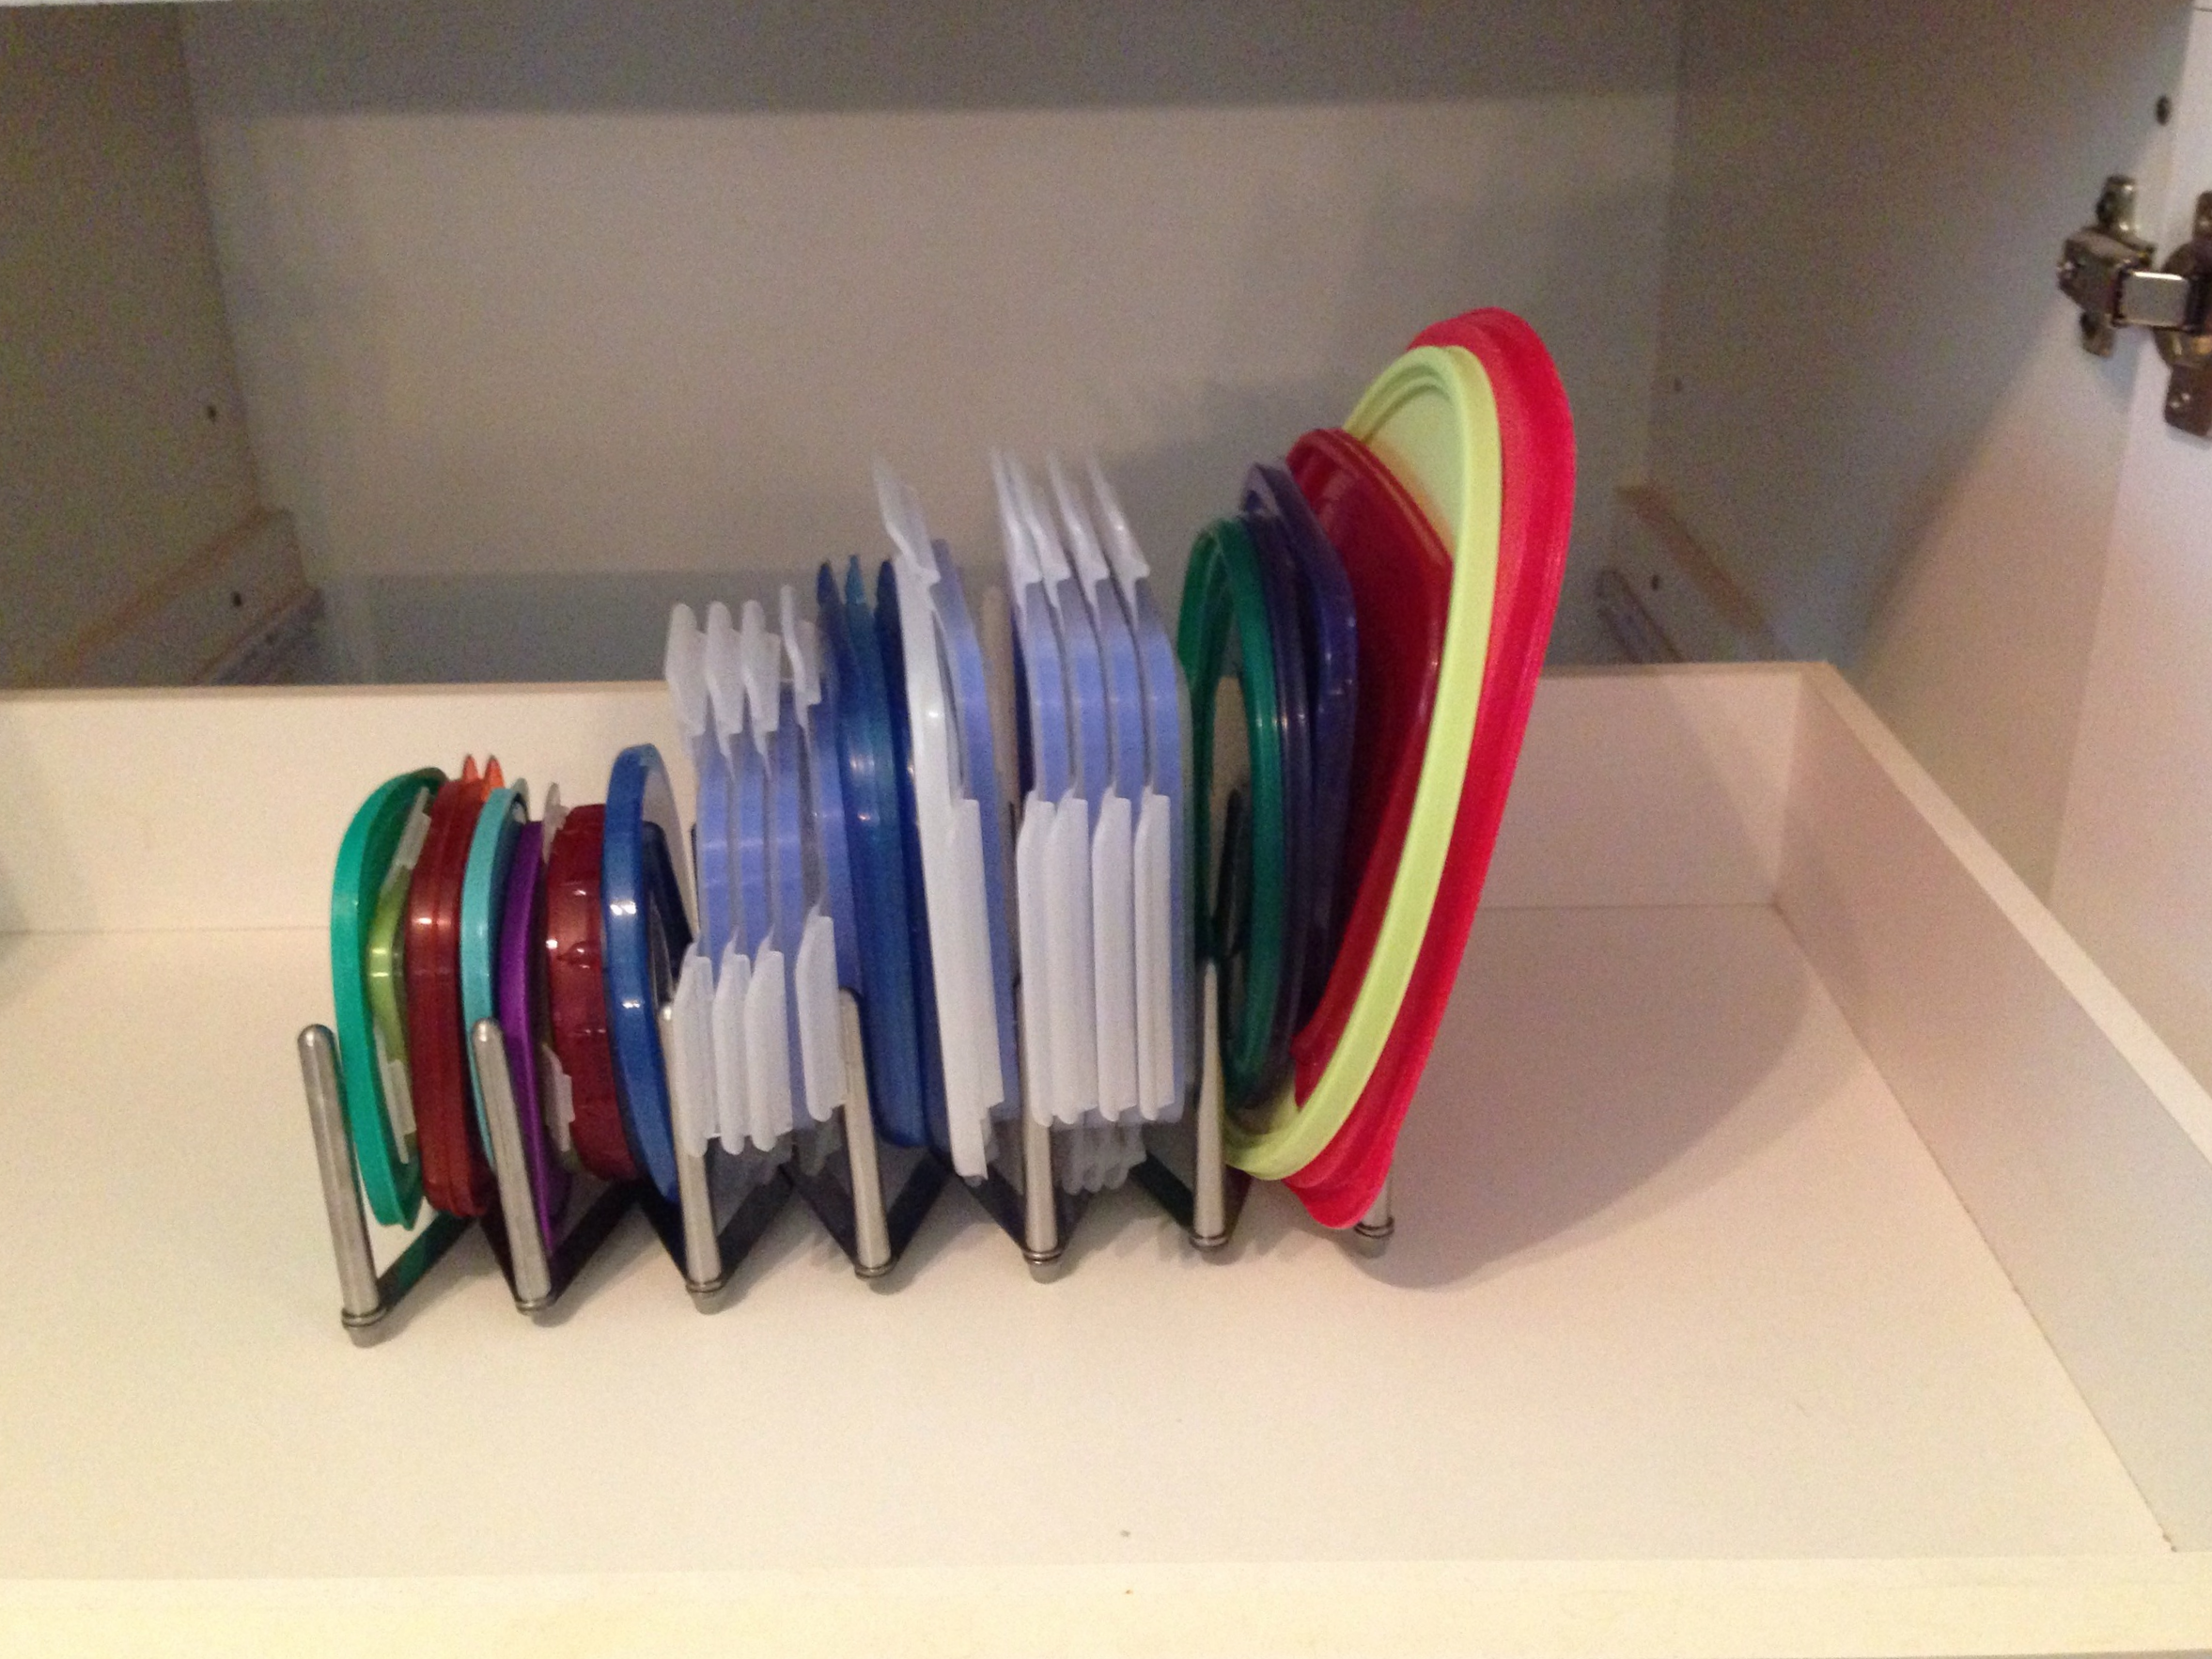
3. Put it Back:  Now, for this step it's important that you are realistic about both the space you have to store these containers and the amount of containers you have. Don't try to fit 100 of them into a drawer meant for cutlery. Either pare down the amount you have or find a new home for them in the kitchen.  I am lucky enough to have pull-out shelve/drawer things, so that's what I use.  When you put the Tupperware back  stack all the round ones together from largest to smallest (without the lids), same for the other shapes.  Then I store the lids next to them.  I love using a pot-lid organizer for this.  I just switched to the Variera from IKEA because you have some flexibility with the spacing, but really, any lid organizer will do.

4. Label it: this is usually my 4th step, but it doesn't really apply here.  Unless you really want to, there is no need to label it.  It's Tupperware, you know what it is.

5. Live with it: Make sure this really works for you.  Not every organizing system works for everyone.  If it's not working for you try to figure out what isn't working.  If you can't, take a picture and send it to me.  I'll try to help you out! Don't be afraid to change it up!

Control the Kitchen Clutter

DIY Paper Clutter Tamer!

Why does paper clutter gravitate towards the kitchen? I know its not just in my home, I see it with my clients all the time.  Either there is some weird gravitational force that pulls all the junk mail, flyers and random papers into the kitchen and spreads them out onto the counters OR we just don't have a great system to deal with them.  I'm going to go with the latter!

A few years ago I bought this great transparent folder that sticks onto the wall. It is from the Martha Stewart collection that was available at Staples/Bureau en Gros. I immediately put it on the inside of a kitchen cupboard door.  I had instant success! It is a great place for us to keep the random papers that we need handy.  No more paper mess on the counters. .  yay!!! Then the overflow happened. The folder got so full that I wasn't able to close the cupboard door.  There was way too much in there and I could no longer find what I needed.  This clearly wasn't working for us anymore.  As a Professional Organizer I am all about adapting systems to changing needs and lifestyle, so I clearly needed another solution.  For a while that meant I was piling papers on top of our microwave. This drove my husband crazy because every time I needed to find a paper I would take the whole pile down, sift through it and leave the papers on the counter.  When my husband would go to clean the kitchen he would ask "what do you want me to do with these papers?".  I would usually respond by snapping at him to leave them be and I would deal with them later, then inevitably get upset when he didn't clean the kitchen properly because he left the papers all over the counter! 

I obviously needed a solution to this; I needed another folder on the wall.  One would be for reference papers I needed to keep handy in the kitchen (i.e. my secondary home office!) and another would be for all the paperwork whose temporary home would be in the kitchen and would need to be filed later. 

I searched for another of those great wall folders, but sadly the product line was discontinued.  Time for a little DIY organizing action!

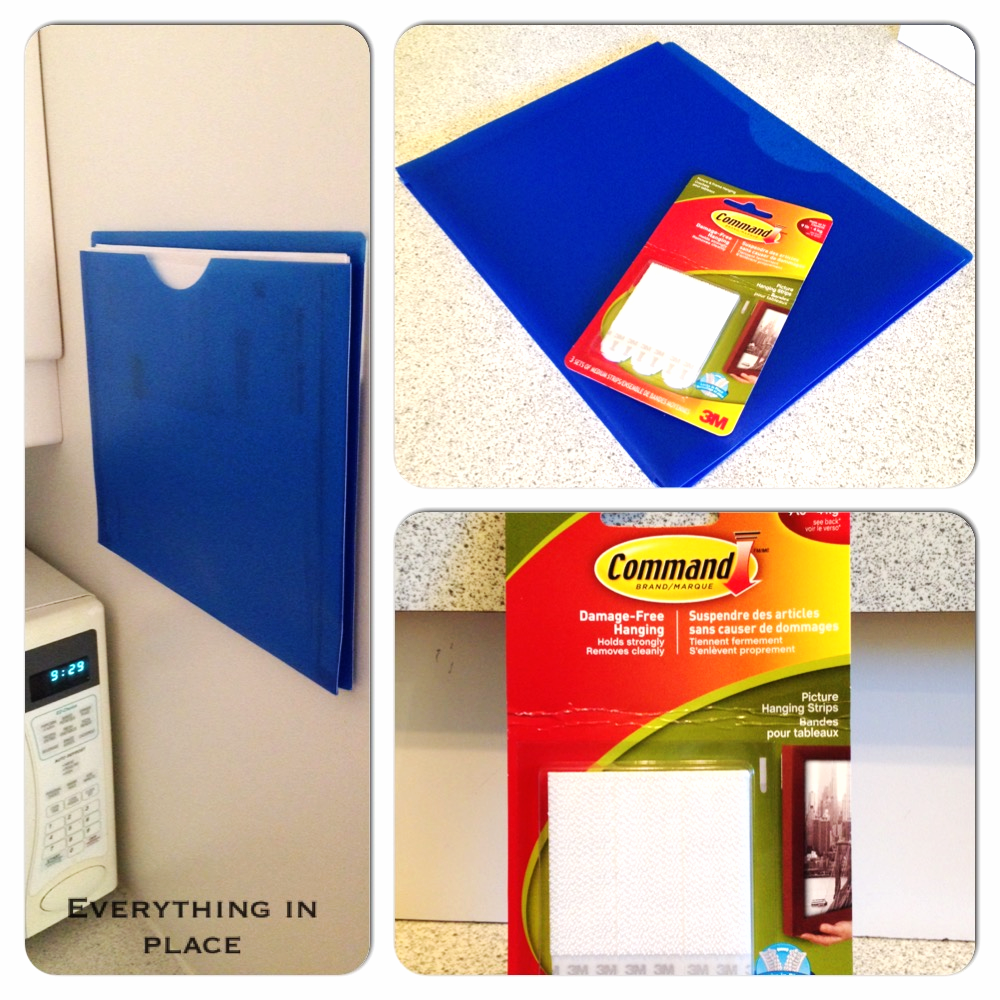
I bought some transparent plastic folders (Staples Poly Vertical Filing Jackets) and Command Picture Hanging Strips (two strips that kind of click together, like Velcro) and went to work.  I found an out of the way spot in the kitchen where I wouldn't see the folder when I walked in.  I attached the strips to the back of the folder and stuck it to the wall. Now I can use the folder for temporary filing and then take it off the wall when it's full to file it in my actual office in the basement.  Problem solved!