No matter where you live, sending kids back-to-school will look very different this year. For some it means on-line classes, for others it will be in-person education and there are also a number of us that will be doing a combination of both. What has become very evident to me is it’s more important than ever to be organized for this incredible time of transition.
Normally this time of year I’m talking about labeling school supplies and uniforms, and while I’m still doing that, I knew it was going to be important to work on something a little different for this year. So when Home Hardware approached me to team up on an organizing project, I knew exactly what I wanted to tackle: my front closet.


It is arguably one of the most used spaces in our home. It houses shoes and jackets, hats and grocery bags, and my family spends a lot of time rummaging through it multiple times per day. While I did have the space relatively organized, we had a standard builder’s grade closet (aka one rod and one shelf) in there and we were limited with what we could do.
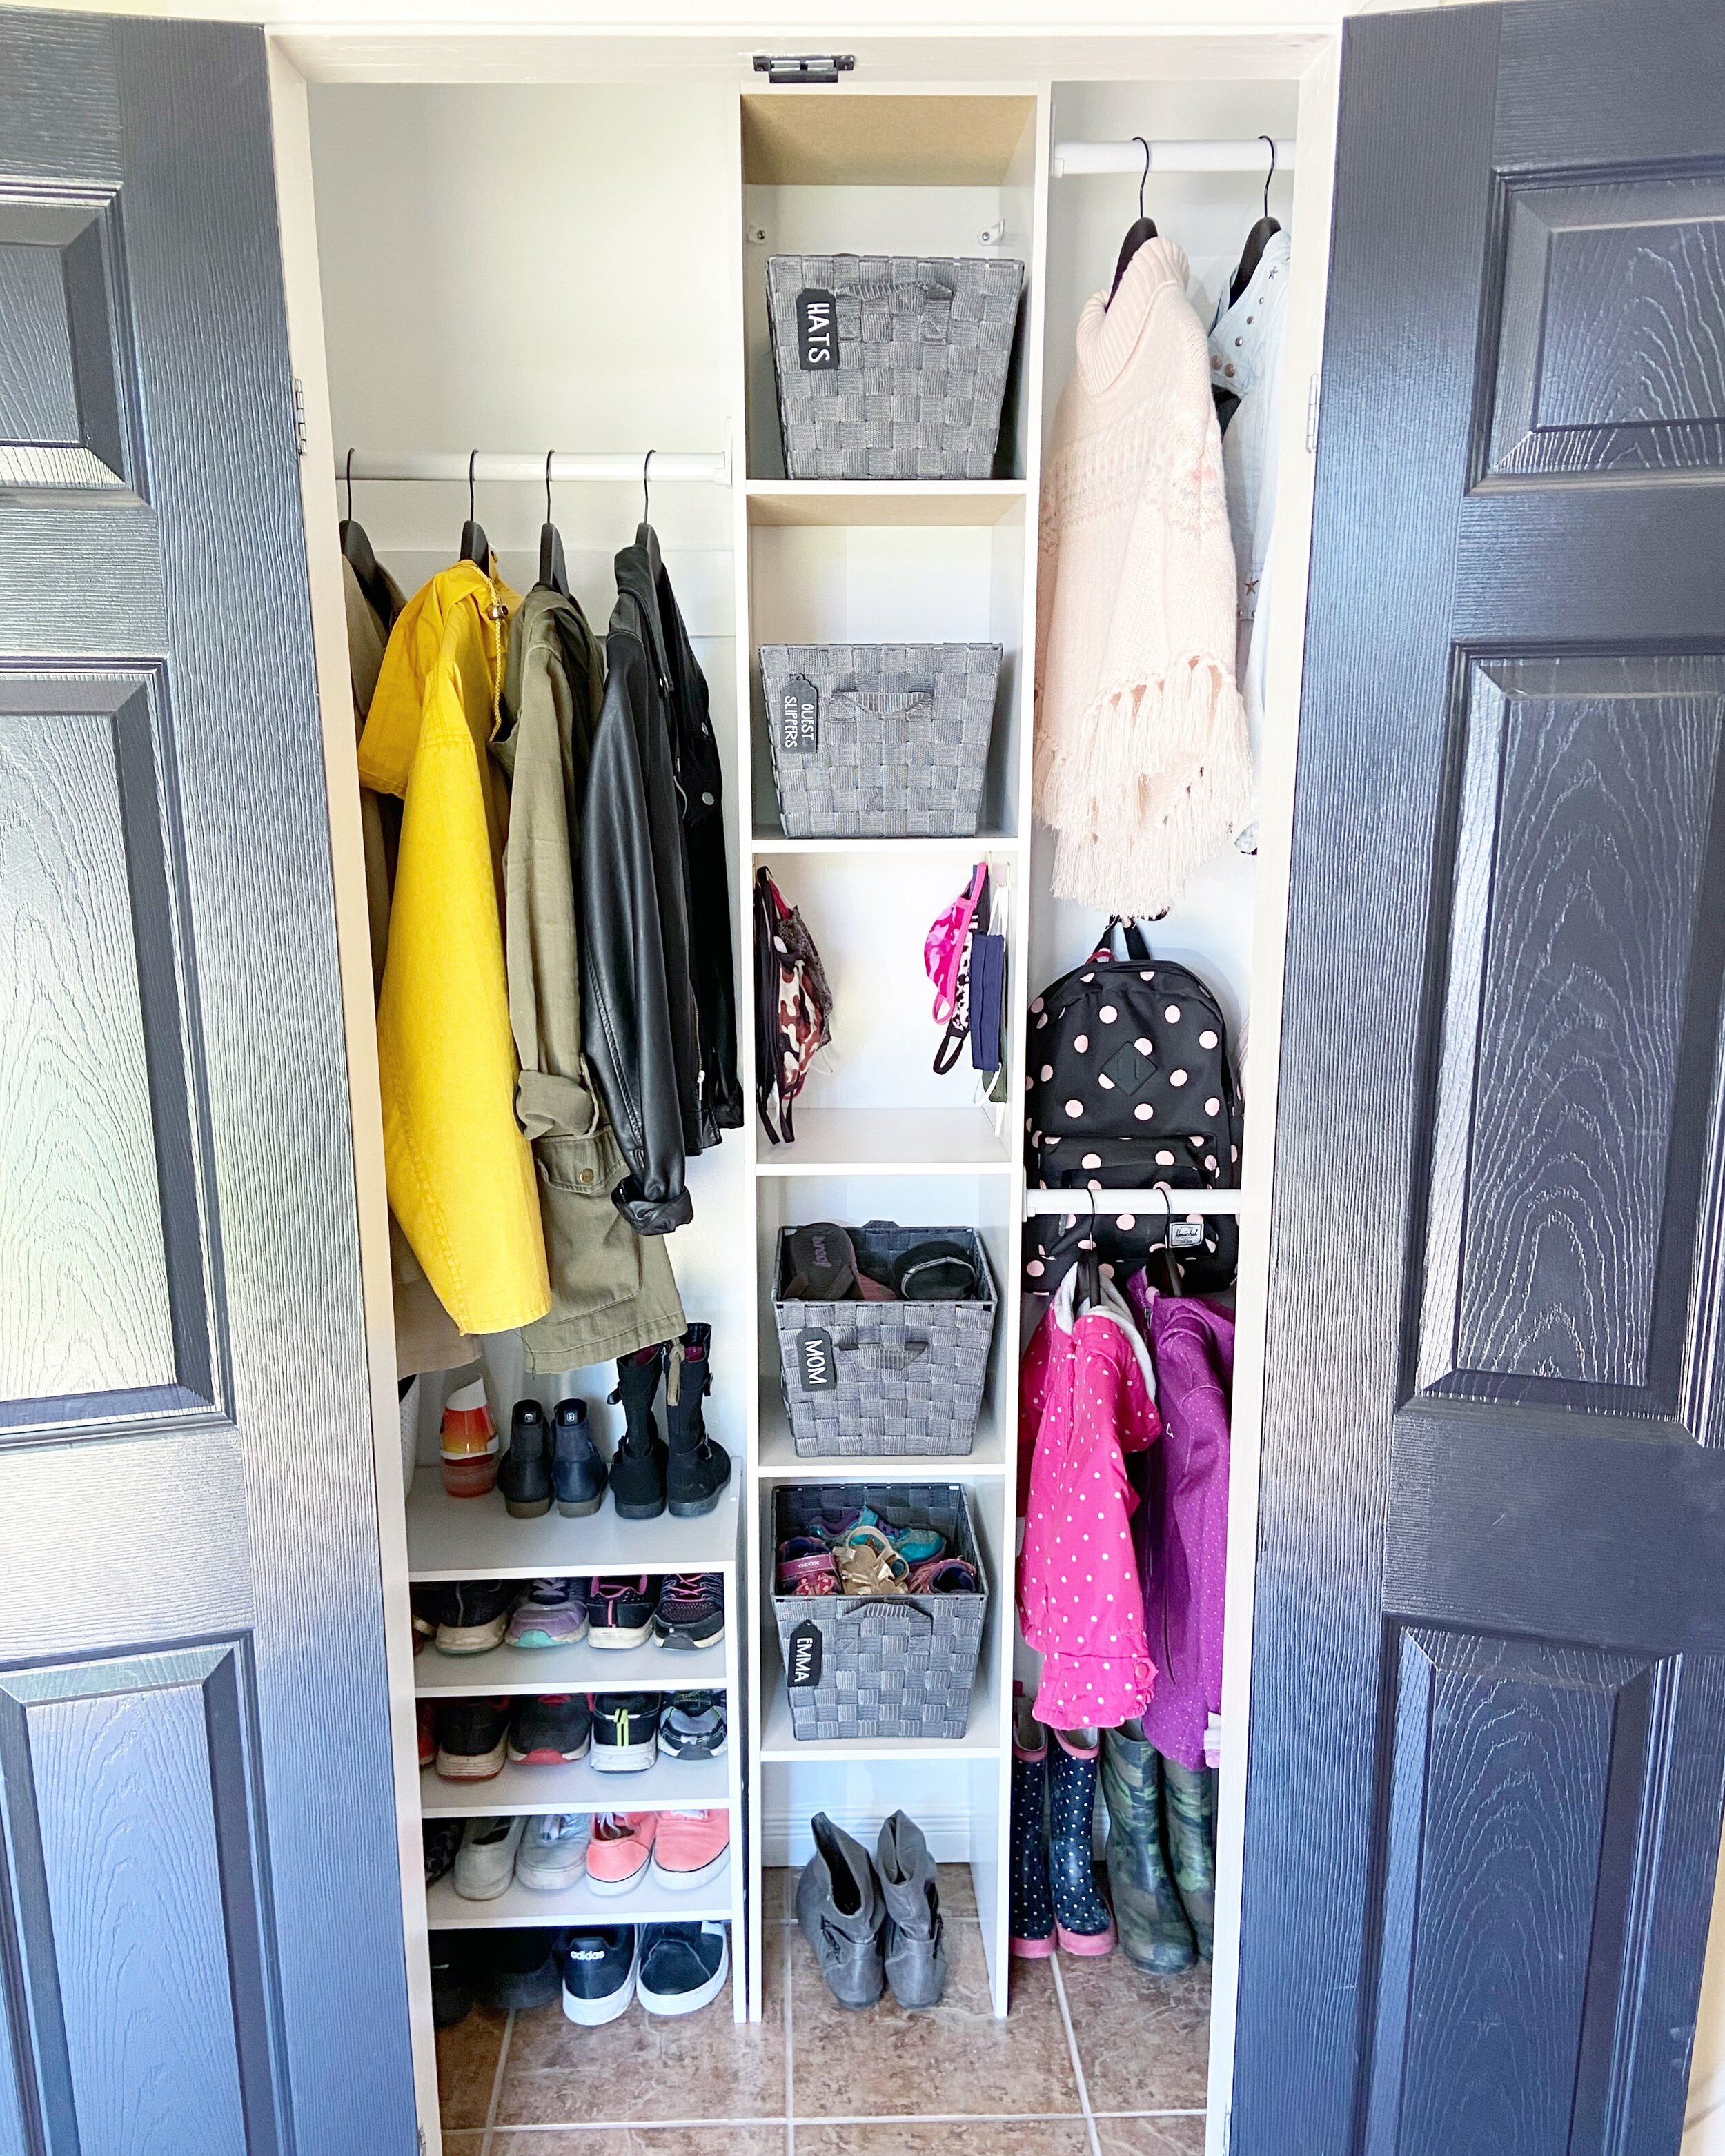
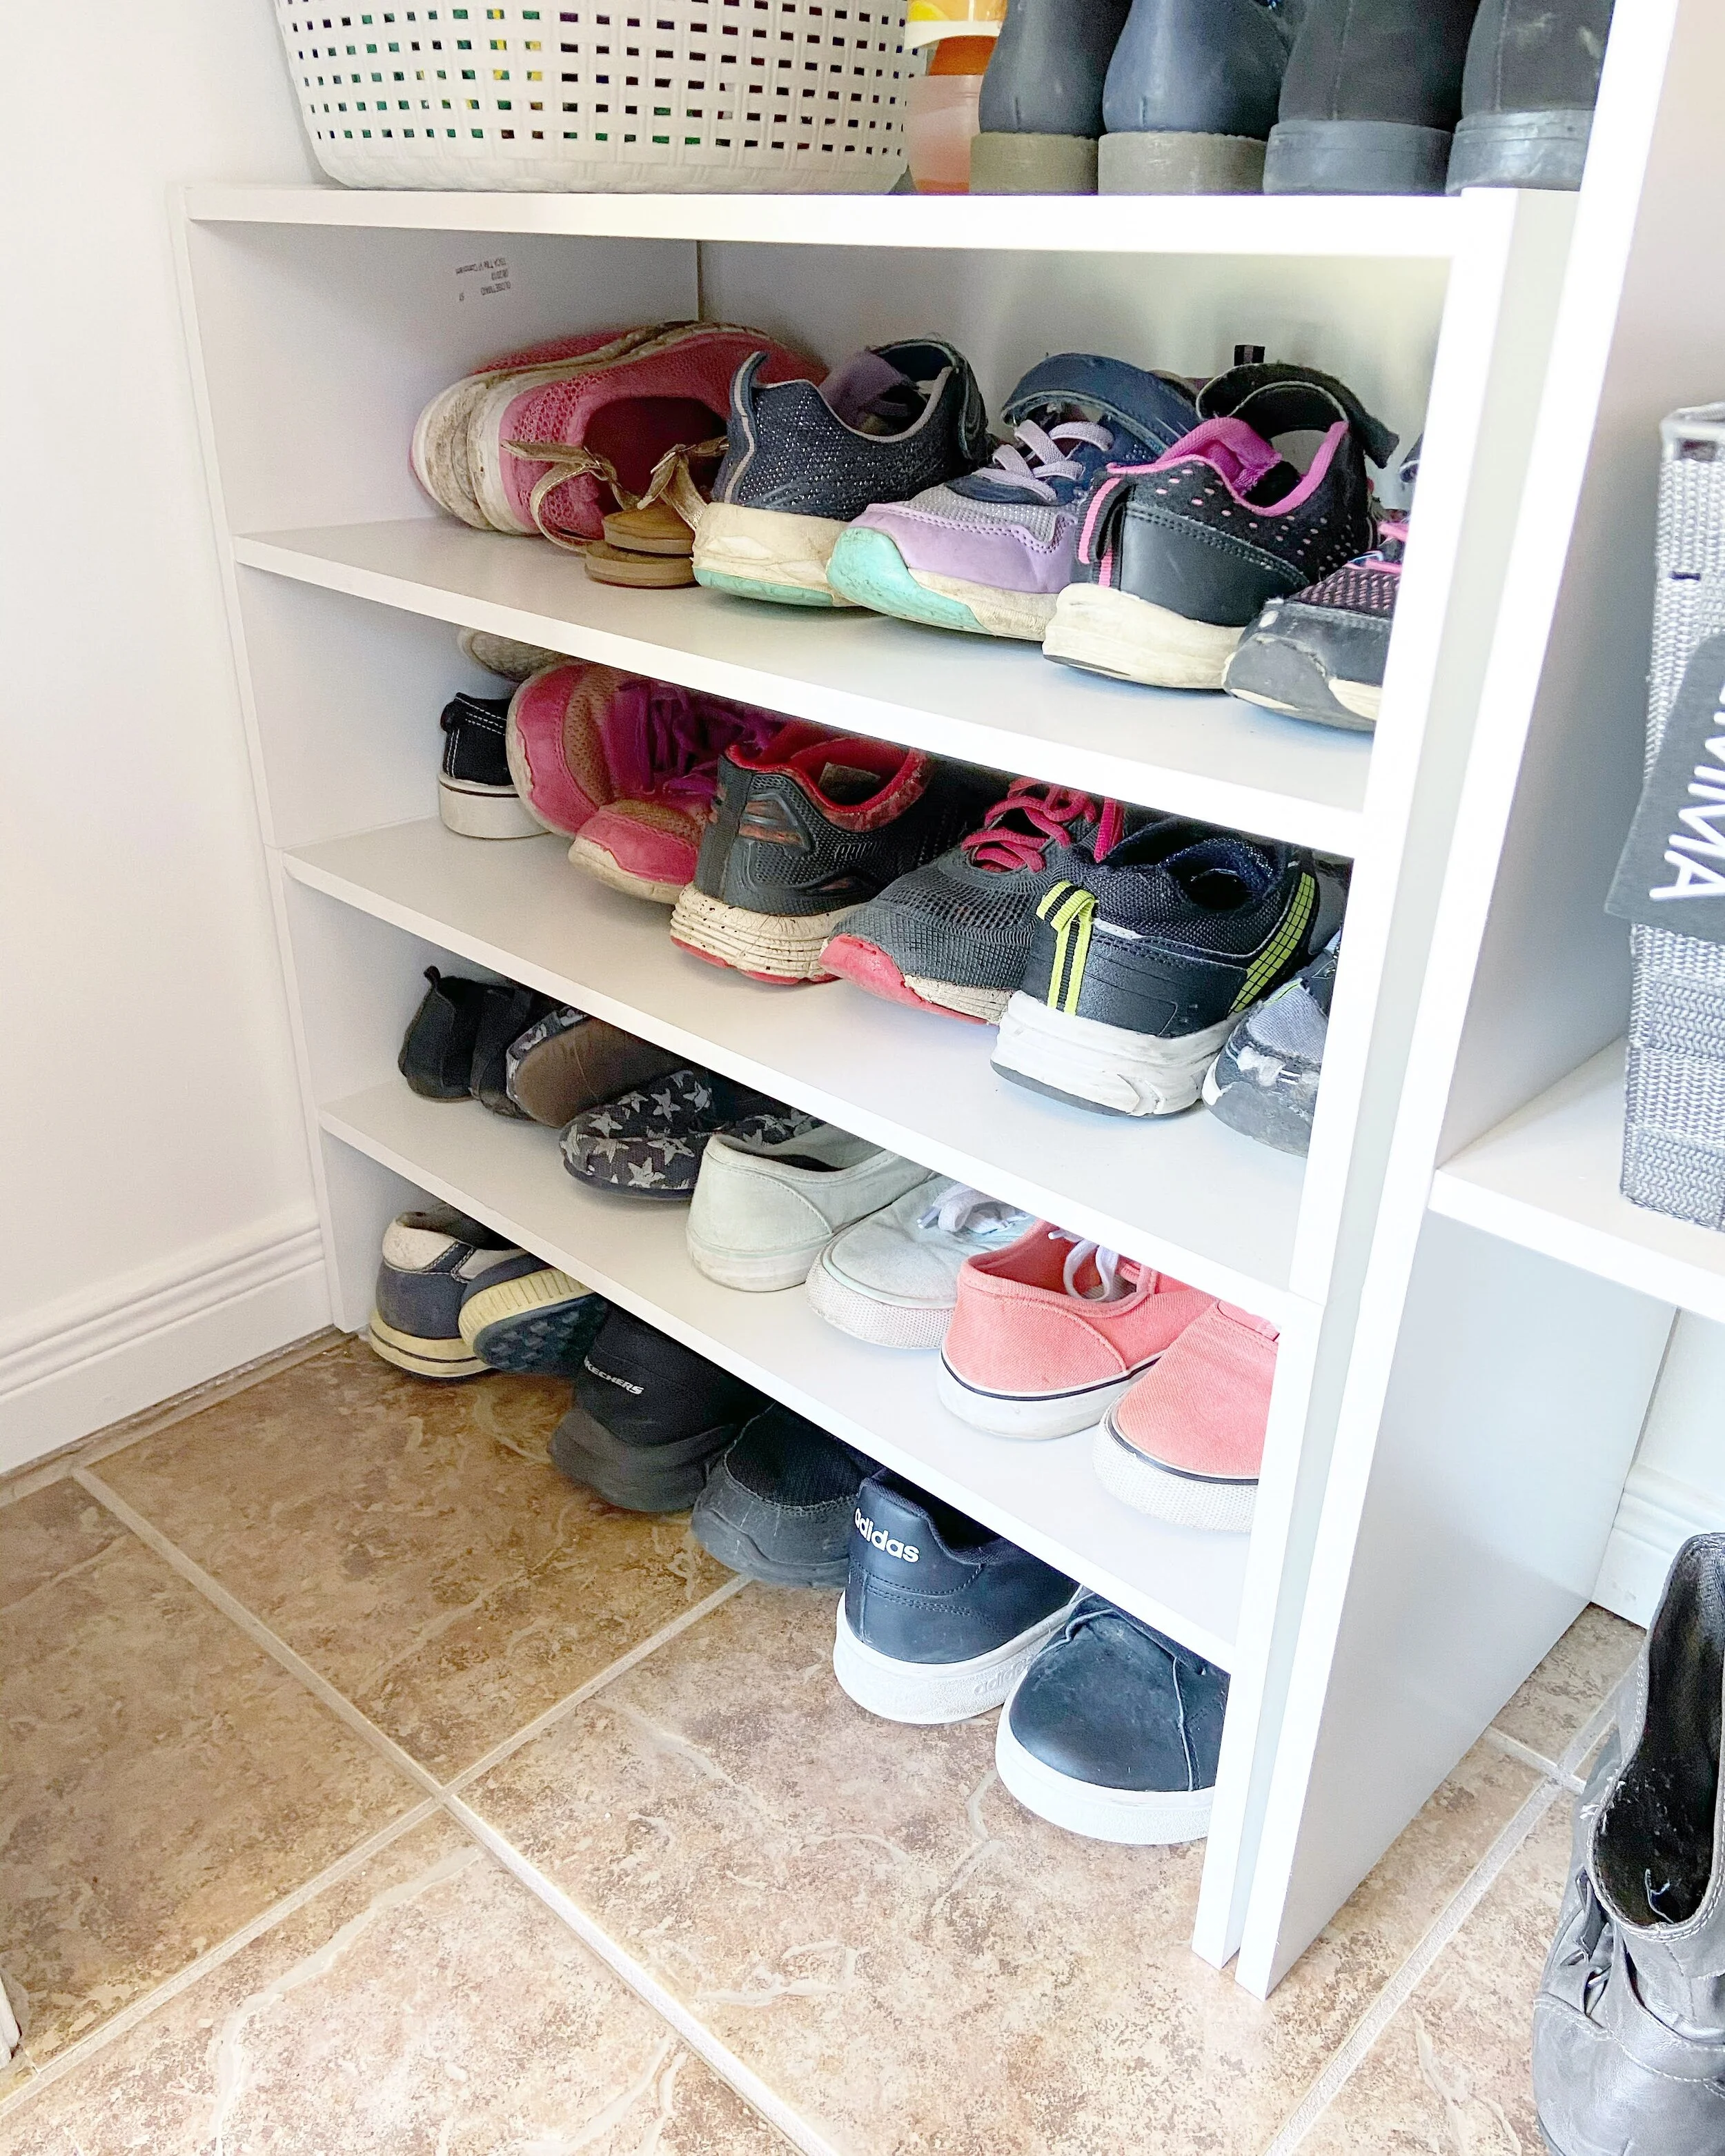
The first thing I did was grab my measuring tape, noted the dimensions and headed over to the Home Hardware website to check out my options. I wanted something that had both shelves and hanging options and was relatively easy to install. So, I chose this closet organizer, and shoe rack, along with these baskets, hooks, hangers and removable hooks.
After removing the original rod and shelf I decided that while the closet was empty I should take the time to repair the walls and put on a fresh coat of paint. I wanted it to be clean and simple so I chose the Beauti-Tone Natura paint in white. I also impulse-purchased this awesome paint can lid that made the process way easier.
Putting together the closet system was easy and straightforward, I did it by myself with the exception of cutting the closet rods. Please don’t be scared off by this, it’s not actually a necessary (or likely recommended!) step but because our closet is so tiny and I wanted the shelving to be in the middle instead of off to one of the sides I decided to cut the rods to achieve the look that I wanted. I enlisted my handy father for this part of the project as I thoroughly don’t enjoy using a saw!
The next step was the installation of the closet system, which basically only involved securing the shelving to the back wall and the rods to the side walls. Again, it was super simple and straightforward and with the help of my level, power drill and screwdriver I was done in practically no time. I made sure to have one of the hanging rods at kid level so that they could easily grab their jackets and hang them back up without me. Whenever you look at a space and how to best make it functional, it’s a really good idea to think about accessibility and who will be using the space. Try to have kid items at kid level so that it’s easy to reach. It both allows them to foster independence and means that you don’t have to be involved in the mundane task of getting their bags and jackets. Double win!
The last step in this project was the most fun for me. Putting everything back and having it be functional and organized for my family!
Other than the obvious stuff that usually lives in the closet I knew that I wanted to create a spot for everyone’s masks and backpacks. I decided to put some removable hooks in one of the center cubbies so that everyone had a spot to hang their clean masks. I chose a level that was accessible to everyone so that the kids could reach their masks easily. I also wanted to maximize the space in our tiny closet so I installed a couple of hooks along the back wall that can be used for things like backpacks, bags or umbrellas.
For the center shelving I decided to go with lightweight baskets to house extra hats, slippers and shoes. I find baskets to be so versatile when organizing a space, they act like little drawers and allow you to easily access your items while at the same time hiding the mess of what’s inside them. I added a few labels so that it was very clear to everyone in the house what was meant to go in each.
Lastly, I swapped out all of the hangers so that they matched. I chose sturdy wooden hangers for this space as when we eventually transition to winter, our coats will be heavier, and I wanted to make sure there was enough support. Having one type of hanger really helps to achieve that streamlined look and reduce the visual clutter.
I knew from the beginning that I would be satisfied with the project, I mean, who would be unhappy with a closet upgrade? But what I didn't expect was how pleased the whole family is with it as well. My kids keep looking into the closet and marveling over how amazing it looks. It feels fresh and clean and functional and I feel great that we are one step closer to being ready for this unprecedented school year.
PS If you want to check out all the videos and pictures from the whole process head on over to my Instagram highlights.
